http://webnautes.tistory.com/829
안드로이드 앱에서 웹서버에서 실행되는 PHP를 이용하여 MySQL 데이터베이스 서버로부터 데이터를 JSON 형식으로 가져오는 간단한 예제입니다.
1. 웹 기반으로 테스트
2. Android 프로젝트 작성
3. 테스트 과정에서 발생할 수 있는 상황들
3.1. MySQL 서버로의 접속 문제
3.2. SQL 관련 문제
4. 관련 포스팅
4.1. Ubuntu 16.04에 LAMP ( Apache2, MySQL , PHP5 / PHP7) 설치하는 방법
4.2. Android PHP MySQL 예제(Ubuntu) - 데이터베이스에 데이터 입력하기
4.3. Android PHP MySQL 예제(Windows 서버) - 데이터베이스에 데이터 입력하기
4.4. Android PHP MySQL 예제 - 데이터베이스 질의(query) 결과 출력하기
5. 참고
1. 웹 기반으로 테스트
Android 앱으로 테스트를 진행하기 전에 웹에서 간단한 테스트를 해보겠습니다.
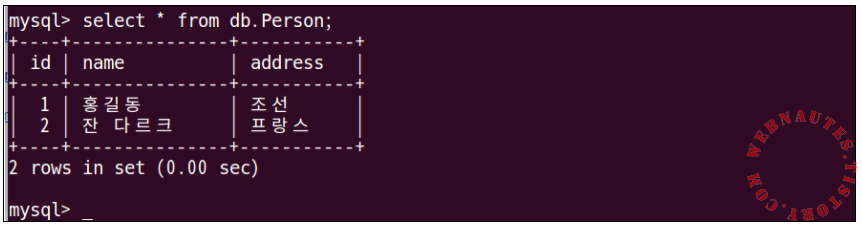
1. 앞에서 진행했던 포스팅의 결과로 현재 db 데이터베이스의 Person 테이블에 다음 데이터가 저장되어 있는 상태입니다.
Android PHP MySQL 예제 - 데이터베이스에 데이터 입력하기
http://webnautes.tistory.com/828
2. getjson.php 라는 이름으로 /var/www/html/ 디렉토리에 파일을 생성합니다.
다음 코드를 getjson.php 파일의 내용 복사해줍니다.
<?php
$link=mysqli_connect("localhost","root","xunil999", "db" );
if (!$link)
{
echo "MySQL 접속 에러 : ";
echo mysqli_connect_error();
exit();
}
mysqli_set_charset($link,"utf8");
$sql="select * from Person";
$result=mysqli_query($link,$sql);
$data = array();
if($result){
while($row=mysqli_fetch_array($result)){
array_push($data,
array('id'=>$row[0],
'name'=>$row[1],
'address'=>$row[2]
));
}
echo "<pre>"; print_r($data); echo '</pre>';
}
else{
echo "SQL문 처리중 에러 발생 : ";
echo mysqli_error($link);
}
mysqli_close($link);
?> |
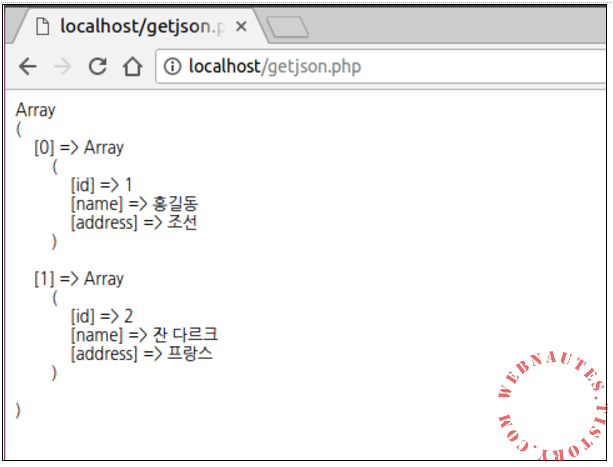
3. 웹브라우저에서 localhost/getjson.php 주소에 접속하면 아래와 같은 화면이 보이게 됩니다.
MySQL로부터 데이터를 가져오면 PHP에선 우선 아래처럼 배열에 저장합니다.
4. Android에 넘겨주기 위해 배열을 JSON 형식으로 변환해야 합니다.
위 코드에서 다음 줄을
echo "<pre>"; print_r($data); echo '</pre>'; |
다음처럼 수정합니다.
header('Content-Type: application/json; charset=utf8');
$json = json_encode(array("webnautes"=>$data), JSON_PRETTY_PRINT+JSON_UNESCAPED_UNICODE);
echo $json; |
5. 웹브라우저에서 localhost/getjson.php 주소에 접속하면 아래와 같은 화면이 보이게 됩니다.

2. Android 프로젝트 작성
1. 이제 웹서버의 PHP 파일에 접근하는 안드로이드 앱을 작성합니다.
안드로이드 스튜디오에서 새로운 프로젝트를 생성합니다.
AndroidManifest.xml 매니페스트 파일의 manifest 태그 하위 항목으로 인터넷 접근 허용 퍼미션을 추가해야 합니다.
<?xml version="1.0" encoding="utf-8"?>
<manifest xmlns:android="http://schemas.android.com/apk/res/android"
package="com.example.webnautes.phptest">
<uses-permission android:name="android.permission.INTERNET" />
<application |
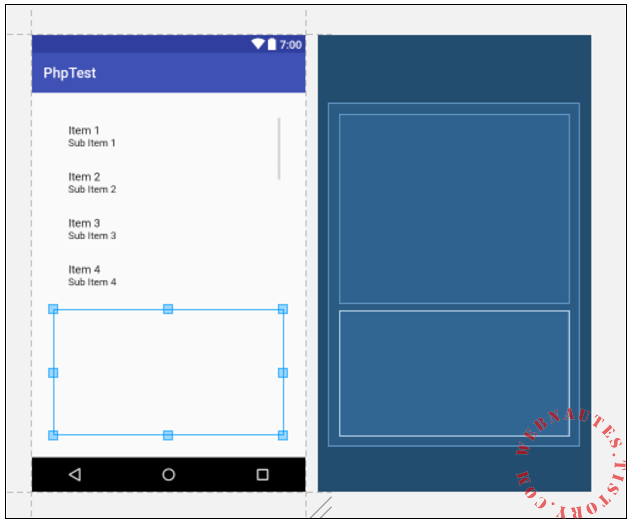
2. activity_main.xml 레이아웃 파일을 아래 내용으로 바꿉니다.
<?xml version="1.0" encoding="utf-8"?>
<LinearLayout xmlns:android="http://schemas.android.com/apk/res/android"
xmlns:tools="http://schemas.android.com/tools"
android:layout_width="match_parent"
android:layout_height="match_parent"
android:orientation="vertical"
tools:context=".MainActivity"
android:layout_margin="15dp"
android:padding="10dp">
<ListView
android:layout_width="match_parent"
android:layout_height="0dp"
android:layout_weight="6"
android:layout_margin="5dp"
android:padding="5dp"
android:id="@+id/listView_main_list" />
<TextView
android:layout_width="match_parent"
android:layout_height="0dp"
android:layout_weight="4"
android:layout_margin="5dp"
android:padding="5dp"
android:id="@+id/textView_main_result" />
</LinearLayout> |
상단의 ListView에는 데이터베이스로부터 가져온 JSON 형식의 데이터를 파싱해서 항목별로 보여주게 됩니다.
하단의 TextView에는 JSON 형식의 데이터 또는 각종 에러를 보여주는 용도로 사용됩니다.
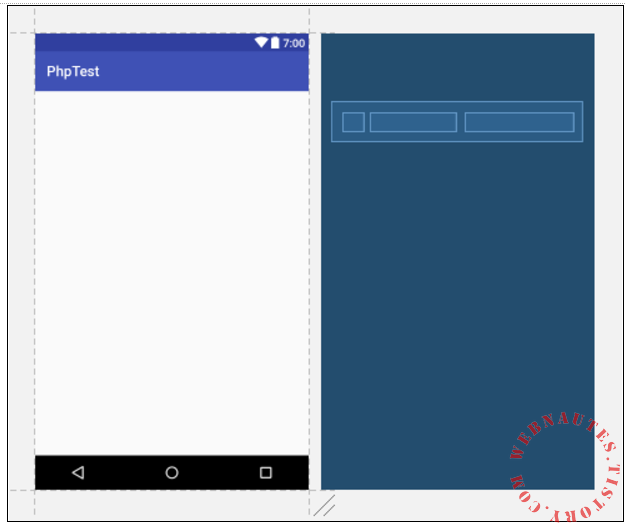
6. item_list.xml 레이아웃 파일을 추가로 생성하여 아래 내용으로 바꿉니다.
<?xml version="1.0" encoding="utf-8"?>
<LinearLayout xmlns:android="http://schemas.android.com/apk/res/android"
xmlns:app="http://schemas.android.com/apk/res-auto"
android:layout_width="match_parent"
android:layout_height="wrap_content"
android:orientation="horizontal"
android:layout_margin="15dp"
android:padding="10dp">
<TextView
android:id="@+id/textView_list_id"
android:layout_width="0dp"
android:layout_height="wrap_content"
android:layout_weight="1"
android:layout_margin="5dp"
android:padding="5dp" />
<TextView
android:id="@+id/textView_list_name"
android:layout_width="0dp"
android:layout_height="wrap_content"
android:layout_weight="4"
android:layout_margin="5dp"
android:padding="5dp" />
<TextView
android:id="@+id/textView_list_address"
android:layout_width="0dp"
android:layout_height="wrap_content"
android:layout_weight="5"
android:layout_margin="5dp"
android:padding="5dp" />
</LinearLayout> |
ListView의 한 줄을 여러 개의 열로 표현하기 위해 필요한 레이아웃입니다.
세 개의 TextVew에 각각의 크기를 지정해주었습니다.
7. MainActivity.java 자바 파일을 아래 내용으로 바꿉니다.
package com.example.webnautes.phptest;
import android.app.ProgressDialog;
import android.os.AsyncTask;
import android.os.Bundle;
import android.support.v7.app.AppCompatActivity;
import android.util.Log;
import android.widget.ListAdapter;
import android.widget.ListView;
import android.widget.SimpleAdapter;
import android.widget.TextView;
import org.json.JSONArray;
import org.json.JSONException;
import org.json.JSONObject;
import java.io.BufferedReader;
import java.io.InputStream;
import java.io.InputStreamReader;
import java.net.HttpURLConnection;
import java.net.URL;
import java.util.ArrayList;
import java.util.HashMap;
public class MainActivity extends AppCompatActivity {
private static String TAG = "phptest_MainActivity";
private static final String TAG_JSON="webnautes";
private static final String TAG_ID = "id";
private static final String TAG_NAME = "name";
private static final String TAG_ADDRESS ="address";
private TextView mTextViewResult;
ArrayList<HashMap<String, String>> mArrayList;
ListView mlistView;
String mJsonString;
@Override
protected void onCreate(Bundle savedInstanceState) {
super.onCreate(savedInstanceState);
setContentView(R.layout.activity_main);
mTextViewResult = (TextView)findViewById(R.id.textView_main_result);
mlistView = (ListView) findViewById(R.id.listView_main_list);
mArrayList = new ArrayList<>();
GetData task = new GetData();
task.execute("http://10.0.2.2/getjson.php");
}
private class GetData extends AsyncTask<String, Void, String>{
ProgressDialog progressDialog;
String errorString = null;
@Override
protected void onPreExecute() {
super.onPreExecute();
progressDialog = ProgressDialog.show(MainActivity.this,
"Please Wait", null, true, true);
}
@Override
protected void onPostExecute(String result) {
super.onPostExecute(result);
progressDialog.dismiss();
mTextViewResult.setText(result);
Log.d(TAG, "response - " + result);
if (result == null){
mTextViewResult.setText(errorString);
}
else {
mJsonString = result;
showResult();
}
}
@Override
protected String doInBackground(String... params) {
String serverURL = params[0];
try {
URL url = new URL(serverURL);
HttpURLConnection httpURLConnection = (HttpURLConnection) url.openConnection();
httpURLConnection.setReadTimeout(5000);
httpURLConnection.setConnectTimeout(5000);
httpURLConnection.connect();
int responseStatusCode = httpURLConnection.getResponseCode();
Log.d(TAG, "response code - " + responseStatusCode);
InputStream inputStream;
if(responseStatusCode == HttpURLConnection.HTTP_OK) {
inputStream = httpURLConnection.getInputStream();
}
else{
inputStream = httpURLConnection.getErrorStream();
}
InputStreamReader inputStreamReader = new InputStreamReader(inputStream, "UTF-8");
BufferedReader bufferedReader = new BufferedReader(inputStreamReader);
StringBuilder sb = new StringBuilder();
String line;
while((line = bufferedReader.readLine()) != null){
sb.append(line);
}
bufferedReader.close();
return sb.toString().trim();
} catch (Exception e) {
Log.d(TAG, "InsertData: Error ", e);
errorString = e.toString();
return null;
}
}
}
private void showResult(){
try {
JSONObject jsonObject = new JSONObject(mJsonString);
JSONArray jsonArray = jsonObject.getJSONArray(TAG_JSON);
for(int i=0;i<jsonArray.length();i++){
JSONObject item = jsonArray.getJSONObject(i);
String id = item.getString(TAG_ID);
String name = item.getString(TAG_NAME);
String address = item.getString(TAG_ADDRESS);
HashMap<String,String> hashMap = new HashMap<>();
hashMap.put(TAG_ID, id);
hashMap.put(TAG_NAME, name);
hashMap.put(TAG_ADDRESS, address);
mArrayList.add(hashMap);
}
ListAdapter adapter = new SimpleAdapter(
MainActivity.this, mArrayList, R.layout.item_list,
new String[]{TAG_ID,TAG_NAME, TAG_ADDRESS},
new int[]{R.id.textView_list_id, R.id.textView_list_name, R.id.textView_list_address}
);
mlistView.setAdapter(adapter);
} catch (JSONException e) {
Log.d(TAG, "showResult : ", e);
}
}
} |
8. 실행결과 입니다.
상단에는 리스트 형태로 MySQL에서 가져온 데이터를 파싱해서 보여줍니다.
하단에는 파싱 전 JSON 형식의 데이터를 보여줍니다.

3. 테스트 과정에서 발생할 수 있는 상황들
PHP 문에서 문제가 발생하면 안드로이드에서 해당 문제를 출력하도록 프로그래밍되어 있습니다.
발생할 수 있는 상황들중 몇가지만 정리해봤습니다.
3.1. MySQL 서버로의 접속 문제
접속 과정에서 문제가 생기면 발생할 수 있는 에러들의 예입니다.
다음은 관련있는 PHP 코드입니다.
$link=mysqli_connect("localhost","root","root 계정 비밀번호","데이터베이스 이름");
if (!$link)
{
echo "MySQL 접속 에러 : ";
echo mysqli_connect_error();
exit();
} |
1. mysqli_connect에 지정한 도메인 주소로 접근이 불가능한 상태입니다.

2. mysqli_connect에 지정한 IP 주소에 있는 서버에서 응답이 없는 경우입니다.
Please Wait 메시지를 보여주다가
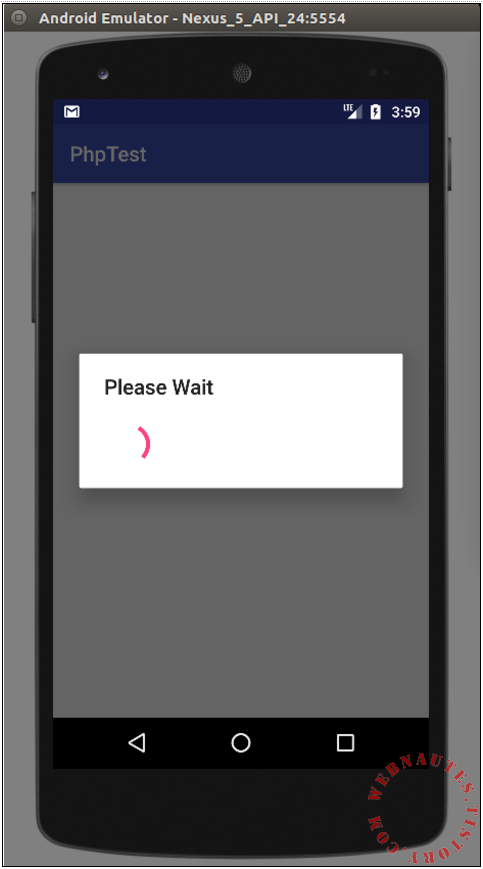
안드로이드 코드에서 설정한 5초안에 서버에서 응답이 없으면 timeout 관련 예외가 발생합니다.

3. MySQL 계정으로 로그인하는데 문제가 있으면 다음과 같은 에러가 납니다.
PHP 코드에서 아이디 혹은 패스워드를 잘못 입력했거나 해당 계정으로 MySQL 서버에 로그인하는데 문제가 있는 경우입니다.

4. 해당 데이터베이스가 존재하지 않는 경우입니다.

3.2. SQL 관련 문제
SQL문 질의 중에 문제가 생기면 발생할 수 있는 에러들의 예입니다.
다음은 관련있는 PHP 코드입니다.
$sql="select * from Person";
$result=mysqli_query($link,$sql); |
SQL문에 지정한 테이블이 존재하지 않는 경우입니다.

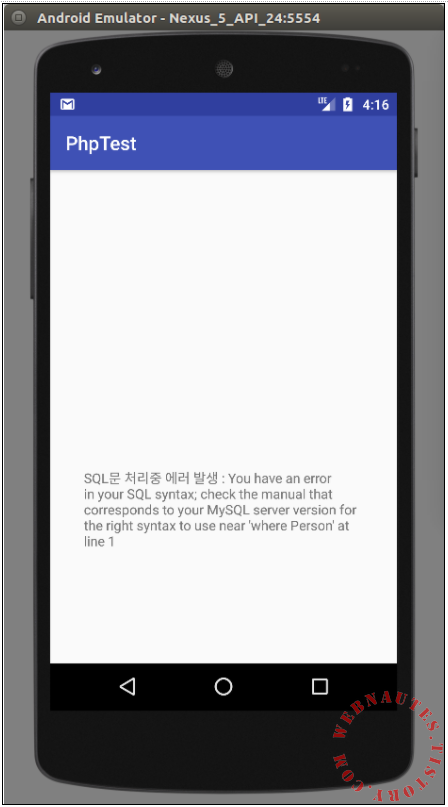
SQL 문법이 틀린 경우에는 다음 같은 에러가 날 수 있습니다.
4. 관련 포스팅
4.1. Ubuntu 16.04에 LAMP ( Apache2, MySQL , PHP5 / PHP7) 설치하는 방법
Apache2 웹서버, MySQL 데이터베이스 서버, PHP를 Ubuntu에 설치하는 과정을 소개합니다.
http://webnautes.tistory.com/1028
4.2. Android PHP MySQL 예제(Ubuntu) - 데이터베이스에 데이터 입력하기
안드로이드 앱에서 웹서버에서 실행되는 PHP를 이용하여 MySQL 데이터베이스 서버에 데이터를 저장하는 간단한 예제입니다.
http://webnautes.tistory.com/828
4.3. Android PHP MySQL 예제(Windows 서버) - 데이터베이스에 데이터 입력하기
Windows에 WampServer 설치해서 같은 작업을 해본 결과물입니다.
http://webnautes.tistory.com/1151
4.4. Android PHP MySQL 예제 - 데이터베이스 질의(query) 결과 출력하기
안드로이드 앱에서 입력한 키워드를 웹서버에서 실행되는 PHP를 이용하여 MySQL 데이터베이스 서버에 질의하는 예제입니다.
http://webnautes.tistory.com/1159
5. 참고
http://codeigniter-kr.org/bbs/view/tip?idx=8300
http://www.simplifiedcoding.net/android-json-parsing-retrieve-from-mysql-database/
http://www.simplifiedcoding.net/android-json-tutorial-to-get-data-from-mysql-database/


