
https://www.jscape.com/blog/https-to-http-reverse-proxy
[Last updated on June 21, 2019] Today, we'll teach you how to set up an HTTPS to HTTP reverse proxy. This service can come in handy if you have an HTTP Web server hosted in an internal network that you would like external clients to access via HTTPS. That way, inbound clients connecting via the Internet can access your site securely.
What we want to do
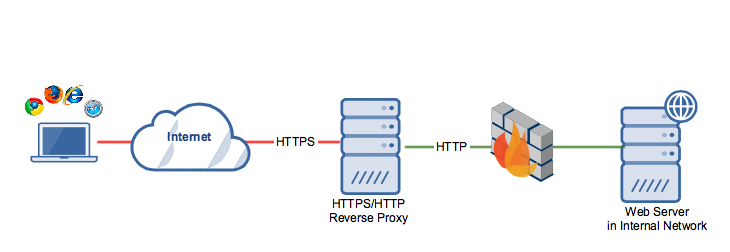
Notice that, while the reverse proxy and web server exchange data via plain HTTP, clients connecting to the reverse proxy communicate over a secure HTTPS connection. As such, these connections are able to benefit from the security functions of SSL/TLS, such as data-in-transit encryption and host authentication.
This configuration makes perfect sense because, while client requests originating from the same internal network as the Web server can be somewhat safe, requests coming from the Internet should be treated with caution.
Sounds good? Let's proceed with tutorial then.
How to Set-Up a HTTPS to HTTP Reverse Proxy
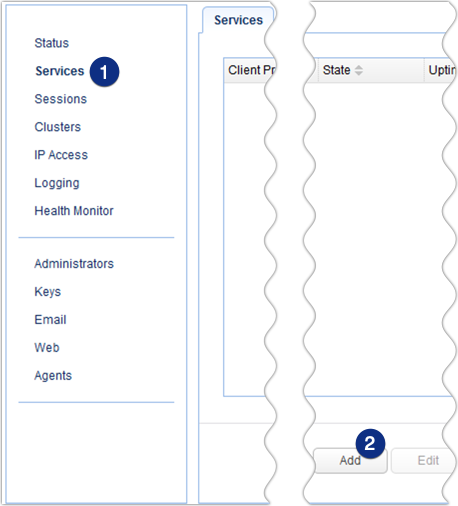
Launch the JSCAPE MFT Gateway Manager, navigate to the Services menu and then click the Add button.
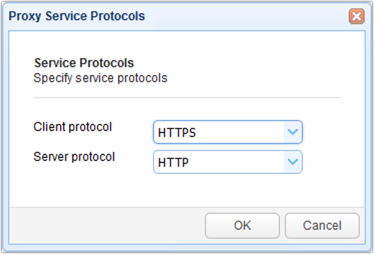
Select HTTPS from the Client protocol drop-down list. This will be the protocol clients will be using to connect to your reverse proxy service. After that, select HTTP from the Server protocol drop-down list. This will be the protocol MFT Gateway will be using to connect to the remote service. When you're done, click OK.
When the proxy service parameters dialog appears, start by entering the IP address of your reverse proxy. This will be the IP address your reverse proxy will be listening on and where external clients will be connecting to via HTTPS. Also specify the port number. The default value is 443.
After that, specify the IP address of your HTTP server. This Web server would likely be found in your internal network, behind your corporate firewall. Also specify the port number of that Web server. The default value is 80.
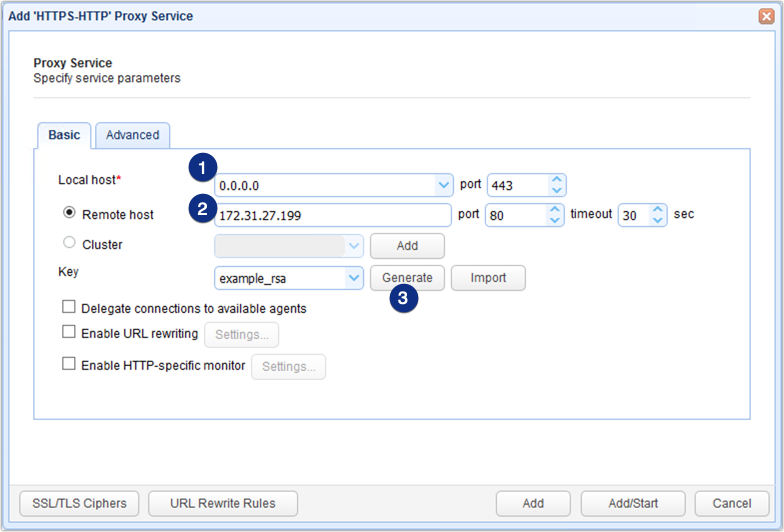
Because clients will be connecting to this service via HTTPS, you need to choose an existing key or generate a new one. Each key will correspond to an SSL/TLS digital certificate and will be used to provide data-in-motion encryption and server authentication. Note, however, that the example_rsa key is only for testing and shouldn't be used in a production environment.
Tick the checkbox that says Enable URL rewriting and then click the Settings button.
There can be instances when you may need to rewrite HTTP headers and/or content. For example, you might want to trap HTTP responses containing the target host/port and replace them with the local host/port of the gateway. This can be especially important in cases where HTML content returned by HTTP/S service contains both relative and absolute URL references.
The URL rewrite rules will enable JSCAPE MFT Gateway to carry out those rewrites automatically.
For more information about setting URL rewrite rules, click that link.
Review your settings and, if everything looks good, finalize this procedure by clicking the Add or Add/Start button.
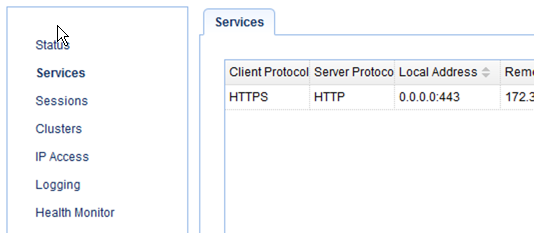
You should now see your HTTPS/HTTP service on the Services screen. Try connecting to it from a couple of Web clients.
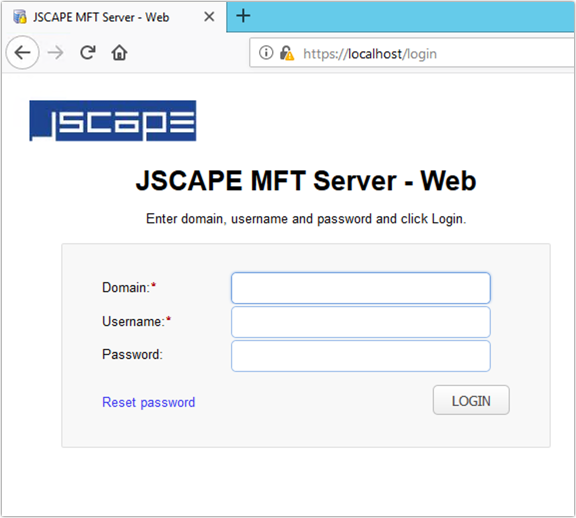
Here's a screenshot showing a Web browser connecting to a JSCAPE MFT Server Web-based file transfer service via the HTTPS/HTTP reverse proxy.
Get Started
Want to try setting up a HTTPS to HTTP Proxy Server yourself? Download the free, fully-functional evaluation edition of JSCAPE MFT Gateway now.
Other articles related to this


