스마트폰앱
- 전화 다이얼러
- 모바일 VOIP
- 안드로이드 프로그램
- 아이폰 앱 프로그램
- 네트워크 프로그램
- JAVA 자바
- UI DESIGN
- android JNI
- http post get
- 휴대폰 해외로밍


 친추
친추 카톡
카톡
라인상담
라인으로 공유
페북공유
◎위챗 : speedseoul

https://www.sysorchestra.com/2015/02/15/ssltls-how-to-https-for-my-site-with-a-valid-certificate/
For me using SSL/TLS for websites or connections between servers and clients in general - think of PostgreSQL connections or OpenLDAP - is no rocket science and my daily business. But in the last months i read a lot of tweets and articles about that topic and talked to some developers and sysadmins like me and was kind of shocked that a lot of people do not really know what SSL/TLS exactly is or how to set up simple encrypted connections or even encrypt a single website.
Since Google recently introduced SSL/TLS as a ranking factor and a lot of people started to encrypt their websites - by the way, everyone should do that even if it is only a private blog - this topic needs to get more attention and clarification on how to use it and set it up correctly.
I would like to try that by creating a series of blog posts about SSL/TLS, what it is, how you can enable it for websites or services and even how to create your very own CA (Certificate Authority) to use it in your company to internally encrypt your sites and services without spending too much money buying expensive certificates from a "trusted" CA.
I will also try to clarify some terms and questions on the SSL/TLS topic. All posts of this series will start with "SSL/TLS:" in the topic. Feel free to contribute or tell me which topic i should cover.
Because it is a common use case to encrypt a single website with a cheap valid certificate, i want to start with this here. How you can improve the security of your new SSL setup will be in a separate post so this one stays beginner friendly.
What do we have?
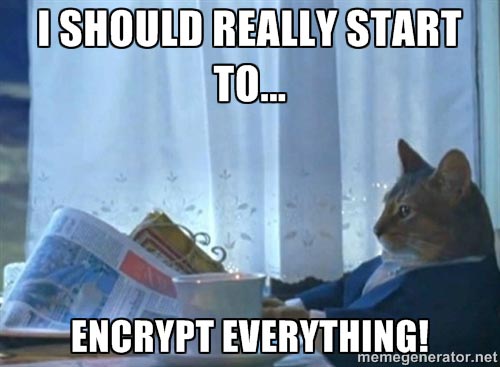
What we have is just a single server with a website running on apache2 or nginx with plain HTTP. We want to change that completely for our website being only available with HTTPS and HTTP being redirected to HTTPS as well. This is also what i did for this blog and i hope after you read through this you are kind of like...
Throughout this SSL/TLS-Series we will use Debian Wheezy. Nevertheless all explanations mostly apply unchanged to other distributions. Just leave a comment if you need help or ping me on twitter.
Let's start by looking at the HTTP configurations for apache2...
# /etc/apache2/sites-enabled/000-default
<VirtualHost *:80>
    ServerAdmin webmaster@example.com
    ServerName www.example.com

    DocumentRoot /var/www/example_com
    <Directory /var/www/example_com/>
	    Options -Indexes FollowSymLinks -MultiViews
	    AllowOverride None
	    Order allow,deny
	    allow from all
    </Directory>

    ErrorLog ${APACHE_LOG_DIR}/example_com_error.log
    LogLevel warn
    CustomLog ${APACHE_LOG_DIR}/example_com_access.log combined
</VirtualHost>
and nginx.
server {
    #listen   80; ## listen for ipv4; this line is default and implied
    #listen   [::]:80 default_server ipv6only=on; ## listen for ipv6

    root /usr/share/nginx/www/example_com;
    index index.html;

    server_name www.example.com;

    location / {
	    # First attempt to serve request as file, then
	    # as directory, then fall back to displaying a 404.
	    try_files $uri $uri/ /index.html;
	    # Uncomment to enable naxsi on this location
	    # include /etc/nginx/naxsi.rules
    }
}
Now we only need to enable SSL for apache2 since it's already built into nginx. But it's quite simple. Just execute the following command via the shell:
a2enmod ssl
How to get a valid certificate?
For most if not all CA's we need to have a CSR (Certificate Signing Request) which is just a simple file containing some information about you and the domain you want a certificate for but in non human-readable format. So for it's creation we need a tool called openssl.
I strongly recommend generating these files as root as well as in a safe folder where no one else can read the private key for example in root's home directory /root.
openssl req -nodes -sha256 -newkey rsa:2048 -keyout example_com_022015.key -out example_com_022015.csr
Upon executing the RSA key pair is generated and we're being asked some questions about our new certificate. The important parts for a cheap but valid certificate are the Common Name which has to be the exact URL of the domain you want to cover and the Email Address. At most CA's for the Common Name you can just use the main domain name like example.com and the www. subdomain is covered by the certificate for free too. Also just press enter twice when asked for a password. If you use one you have to enter it every time you restart the webserver.
An example output from the command may look like the following:
Generating a 2048 bit RSA private key
....................................+++
..........................+++
writing new private key to 'example_com_022015.key'
-----
You are about to be asked to enter information that will be incorporated
into your certificate request.
What you are about to enter is what is called a Distinguished Name or a DN.
There are quite a few fields but you can leave some blank
For some fields there will be a default value,
If you enter '.', the field will be left blank.
-----
Country Name (2 letter code) [AU]:DE
State or Province Name (full name) [Some-State]:Berlin
Locality Name (eg, city) []:Berlin
Organization Name (eg, company) [Internet Widgits Pty Ltd]:Sysorchestra Corp.
Organizational Unit Name (eg, section) []:IT
Common Name (e.g. server FQDN or YOUR name) []:example.com
Email Address []:admin@example.com

Please enter the following 'extra' attributes
to be sent with your certificate request
A challenge password []:
An optional company name []:
Not to bore you with too much details about the parameters we've just created a new CSR and the corresponding private key using 2048bit RSA. The CSR contains the public key part of the newly created RSA key pair and is signed with the SHA-256 Hash. The .key file is the private key and must be kept safe otherwise your HTTPS encryption is useless!
I also recommend to use some kind of timestamp for your files so you always know when you created them and which key belongs to which CSR/certificate.
We got the CSR but what about the CRT?
Or in other words: What kind of black magic do we need to apply to create a certificate out of a certificate signing request? Exactly! Let us send the CSR to a CA!
For this guide i use namecheap.com which really has some of the cheapest domain-validated certificates here.
You may choose the Positive SSL certificate from Comodo which we use in this guide and continue to the checkout. After you bought the certificate we have to send them our CSR so they can request the actual certificate for us.
For this click on "Manage SSL Certificates" in your account and then "Activate now" next to your newly bought certificate. For apache2 and nginx webservers with SSL (which is the most common combination) you have to choose "Apache + OpenSSL" in the Webservers dropdown menu.
Now we have to copy the contents of the CSR file into the textbox below. Get the contents easily with the shell and copy everything including the BEGIN and END lines.
$ cat /root/example_com_022015.csr
-----BEGIN CERTIFICATE REQUEST-----
MIIC1zCCAb8CAQAwgZExCzAJBgNVBAYTAkRFMQ8wDQYDVQQIDAZCZXJsaW4xDzAN
BgNVBAcMBkJlcmxpbjEbMBkGA1UECgwSU3lzb3JjaGVzdHJhIENvcnAuMQswCQYD
VQQLDAJJVDEUMBIGA1UEAwwLZXhhbXBsZS5jb20xIDAeBgkqhkiG9w0BCQEWEWFk
bWluQGV4YW1wbGUuY29tMIIBIjANBgkqhkiG9w0BAQEFAAOCAQ8AMIIBCgKCAQEA
075hQbral4vNpTxXy5sMD6EEFCPI6vfzHXHO4oaEr10+59U0F8xKXUiHDfsb+rQN
kPhsUbVR0WqBmN6yOylgmEzXR0rfmI3rfoYN0JqKixuvHjixLftc/5diwqMk1bTc
QQ7mYmSLGPKS4En/Ew7QGDvwZANr/j3/zPJA+UcTgy6RZlhMeoVZIfxwn8s5Kd3q
298oE0qelROPFf8XXriOzugvwuojHwYiaf/EzM6mZlFAIumQko10fUcOpwomeD2L
cf5wladtcwqsZc43r/HSjG1rWnJ/KGkdFloyOFs5vffn1xFlqrNnKeaUURCleotd
09s/vzTUWummOfsqXIGnywIDAQABoAAwDQYJKoZIhvcNAQELBQADggEBAGO7BhNl
F9QxvWKCkFdTnpOU2SRgMS71mFhF98aNKC52MGVzlpQCb1iMl5oyCTnx54wn/tVc
Z5SIWVIgydZccz8Mm0BGADW6KPV/cCMJlidsEagjTtJsWYRH0jS295D/iUcKH2/z
JxGfRPy1N8evm1xbZcYRP+kLjTdtadM9xy1J4V/YDqJWIhFzF+lF+yElRa+NWFS5
1sHYO4rwDviILMn7DTmCA5xGCwODFYtJVHEcCMFvhhb4pv9xQsgPLhScNoUw97be
4qKRFid53OWaFDRiBK2DehYn7Q3GXnvCWkTaQ4ZOWrhUg/LX03d2vapZbpugxQPt
gjKvLN8pibb2apo=
-----END CERTIFICATE REQUEST-----
On the next page the CSR details will be shown so we can re-check the information. We also need to choose an approver email which is used to check if we have enough control over the domain we want to generate the certificate for. Therefore the list of email addresses we can use is limited to the most commonly used addresses by administrators. We may choose admin@example.com which we also used in the CSR. Note that this email address must exist in order to continue!
In the last step we need to enter the admins email address were the final certificate is being sent to as well as the administrative contact. After finalizing we have to wait. Meanwhile we will get an email where we need to prove that we control this email address by clicking the link in the email and confirm that with a random string also provided in the email itself.
After we have successfully accomplished all that we will finally get our certificate and some intermediate certificates in a ZIP file. Hurray!
Get the certificate(s) in place
At first we need to upload the ZIP file into the /root folder where our CSR and private key reside and unzip it afterwards:
$ unzip example_com.zip
Archive:  example_com.zip
extracting: AddTrustExternalCARoot.crt
extracting: COMODORSAAddTrustCA.crt
extracting: COMODORSADomainValidationSecureServerCA.crt
extracting: example_com.crt
Now we need to combine the additional certificates into a bundle for apache2 and a second bundle including the sites certificate for nginx since nginx requires a single file with all certificates from the chain except the CA root certificate which is the AddTrustExternalCARoot.crt. We dont need this one because every major browser as well as the ca-certificates package for linux distributions contains them - except it has been revocated in the meantime.
While making the bundle file we only have to copy and paste every single certificate's file content after another starting with the site certificate - the so called leaf certificate - so that the browser can read and check them in order or from the leaf to the stem (root certificate).
Making such bundles in Linux is quite easy if you know the power of the shell.
# For apache2
cat COMODORSADomainValidationSecureServerCA.crt COMODORSAAddTrustCA.crt > example_com_022015_apachebundle.crt

# For nginx
cat example_com.crt COMODORSADomainValidationSecureServerCA.crt COMODORSAAddTrustCA.crt > example_com_022015_nginxbundle.crt
If you choose another CA for buying your certificate, the order and naming of the certificates is different. You can easily find out the order of the certificates by looking at the issuer of every certificate.
$ openssl x509 -text -noout -in AddTrustExternalCARoot.crt | grep Issuer
    Issuer: C=SE, O=AddTrust AB, OU=AddTrust External TTP Network, CN=AddTrust External CA Root
$ openssl x509 -text -noout -in COMODORSAAddTrustCA.crt | grep Issuer
    Issuer: C=SE, O=AddTrust AB, OU=AddTrust External TTP Network, CN=AddTrust External CA Root
....
So you can see that COMODORSAAddTrustCA.crt is being trusted by AddTrustExternalCARoot.crt and this one is trusted by itself, therefore this one is the Root CA and doesn't need to be bundled. Continue with the remaining certificates that came with the ZIP file until you reach your leaf certificate, then build up the bundle in reverse order with cat.
In the last step we have to put the leaf or site certificate the bundle and the key file in place for usage by the system. The following folders will vary depending on your distrubiton or operating system but you can find out which ones they are easily with a common search engine.
# Copy the private key
cp /root/example_com_022015.key /etc/ssl/private/

# Copy the certificate and the bundle(s)
# For apache2
cp /root/example_com_022015.crt /etc/ssl/certs/
cp /root/example_com_022015_apachebundle.crt /etc/ssl/certs/
# For nginx
cp /root/example_com_022015_nginxbundle.crt /etc/ssl/certs/
Reconfigure the Webserver
Now we have to reconfigure the Webservers to use these certificates and redirect all HTTP traffic to our shiny new HTTPS site.
Apache2
Since we already enabled the ssl plugin for apache2 we only have to enable the default-ssl site which we can now use after initial editing. Enable it with a2ensite default-ssl. In the following code, i removed all unnecessary comments. If you want to learn more about advanced TLS configurations you might want to read them.
I've also removed the normal vhost config since the interesing parts are the new vhost port and the SSL parameters below. Read the inline comments for more information.
# IfModule checks if the ssl plugin is enabled. If it's not, this vhost is disabled
<IfModule mod_ssl.c>
# Take care of the new default HTTPS port 443. If you have multiple SSL sites you might want to change _default_ to the IP this host should listen on or to * if all SSL vhosts should listen on all IP's. In this case you're using SNI. SNI is explained in a later post.
<VirtualHost _default_:443>
    ServerAdmin webmaster@example.com
    ServerName www.example.com

    DocumentRoot /var/www/example_com
    <Dire...
    ...
    ...ory>

    ErrorLog ${APACHE_LOG_DIR}/example_com_error.log
    LogLevel warn
    CustomLog ${APACHE_LOG_DIR}/example_com_ssl_access.log combined

    # Let us enable the SSL plugin here
    SSLEngine on
    # This parameter defines our leaf or site certificate (it can be .crt or .pem)
    SSLCertificateFile    /etc/ssl/certs/example_com_022015.crt
    # SSLCertificateChainFile is needed unless our leaf certificate is the trusted Root CA certificate itself, so let us also define this
    SSLCertificateChainFile /etc/ssl/certs/example_com_022015_apachebundle.crt
    SSLCertificateKeyFile /etc/ssl/private/example_com_022015.key
</VirtualHost>
</IfModule>
In the last step we need to check our new configuration for errors before we restart apache. We do this with a simple apachectl configtest. If it says Syntax OK we could restart apache2 with service apache2 restart but we want to make the HTTP to HTTPS redirect before.
In the last step we rewrite our HTTP Vhost to do a 301 redirect to our new HTTPS site for example.com with and without the www. subdomain prefix.
<VirtualHost *:80>
    ServerAdmin webmaster@example.com
    ServerName www.example.com
    ServerAlias example.com

    RewriteEngine On
    RewriteRule ^(.*)$ https://www.example.com$1 [R=301]
</VirtualHost>
Now restart apache with service apache2 restart or just run the configtest again.
Note that you can also add the four SSL Lines into your existing HTTP Vhost. You only need to change the port as well before restarting but i recommend using a separate one in case you have to go back or serve different content.
Nginx
In Nginx simply create another file called /etc/nginx/sites-available/default-ssl with the following content.
server {
	listen 443 ssl;
	server_name www.example.com;

	root /usr/share/nginx/www/example_com;
	index index.html;

	ssl on;
	ssl_certificate /etc/ssl/certs/example_com_022015_nginxbundle.crt;
	ssl_certificate_key /etc/ssl/private/example_com_022015.key;

	ssl_session_timeout 5m;

	ssl_protocols TLSv1;
	ssl_ciphers ALL:!ADH:!EXPORT56:RC4+RSA:+HIGH:+MEDIUM:+LOW:+SSLv3:+EXP;
	ssl_prefer_server_ciphers on;

	location / {
		try_files $uri $uri/ =404;
	}
}
In the last step we need to enable the new site and restart nginx. For this create a symlink to enable it with ln -s /etc/nginx/sites-available/default-ssl /etc/nginx/sites-enabled/default-ssl. Now edit the default HTTP config again for our 301 redirect.
server {
    listen 80;
    server_name .example.com; # The dot in front means every subdomain!

    return 301 https://www.example.com$request_uri;
}
Now restart nginx with service nginx restart.
Final words
You've made it, congrats! You've successfully migrated your first site completely from HTTP to HTTPS and made the web a bit more secure. You not even increased privacy of your visitors against 3rd parties but also increased their trust towards you.
Since this post only covered the first steps on how to get a valid certificate and how to install it on apache2 and nginx-driven sites i really recommend reading the other SSL/TLS posts which - for example - cover tweaking the configuration parameters to further enhance the security!
The next posts will follow in the next days and couple of weeks. I will also link them below and cross-link the posts between each other, so you can easily switch between the topics.